For Downloadable User Roles (DUR) on Aruba OS-CX switches, you need to install the root cert for your HTTPS Server Certificate in ClearPass. In OS-CX this isn’t downloaded automatically as it was in AOS-S switches (the software on Arubas older switch models) and if you have many switches it could be cumbersome to SSH to all of them and add the certificate and that’s where NetEdit comes in.
I first tested to add the certificate by selecting all the switches and going into “Edit Config” but when I pasted the certificate it just dropped the certificate to the bottom of the configuration and marked it red, I tested a few different times but couldn’t get it to work. But then I got the suggestion to use the “Add and Remove Configuration” under “Deploy Solution” which I tested and that worked on the first try!
So here is how I did it:
First, select “Devices” on the left side so you see all your switches. Then you select the switches you want to push the configuration to by clicking the square to the left of the hostname of the switch and then clicking on “Action” up to the right.


crypto pki ta-profile clearpass
   ta-certificate
       -----BEGIN CERTIFICATE-----
       MIIFFjCCAv6gAwIBAgIRAJErCErPDBinU/bWLiWnX1owDQYJKoZIhvcNAQELBQAw
       TzELMAkGA1UEBhMCVVMxKTAnBgNVBAoTIEludGVybmV0IFNlY3VyaXR5IFJlc2Vh
       cmNoIEdyb3VwMRUwEwYDVQQDEwxJU1JHIFJvb3QgWDEwHhcNMjAwOTA0MDAwMDAw
       WhcNMjUwOTE1MTYwMDAwWjAyMQswCQYDVQQGEwJVUzEWMBQGA1UEChMNTGV0J3Mg
       RW5jcnlwdDELMAkGA1UEAxMCUjMwggEiMA0GCSqGSIb3DQEBAQUAA4IBDwAwggEK
       AoIBAQC7AhUozPaglNMPEuyNVZLD+ILxmaZ6QoinXSaqtSu5xUyxr45r+XXIo9cP
       R5QUVTVXjJ6oojkZ9YI8QqlObvU7wy7bjcCwXPNZOOftz2nwWgsbvsCUJCWH+jdx
       sxPnHKzhm+/b5DtFUkWWqcFTzjTIUu61ru2P3mBw4qVUq7ZtDpelQDRrK9O8Zutm
       NHz6a4uPVymZ+DAXXbpyb/uBxa3Shlg9F8fnCbvxK/eG3MHacV3URuPMrSXBiLxg
       Z3Vms/EY96Jc5lP/Ooi2R6X/ExjqmAl3P51T+c8B5fWmcBcUr2Ok/5mzk53cU6cG
       /kiFHaFpriV1uxPMUgP17VGhi9sVAgMBAAGjggEIMIIBBDAOBgNVHQ8BAf8EBAMC
       AYYwHQYDVR0lBBYwFAYIKwYBBQUHAwIGCCsGAQUFBwMBMBIGA1UdEwEB/wQIMAYB
       Af8CAQAwHQYDVR0OBBYEFBQusxe3WFbLrlAJQOYfr52LFMLGMB8GA1UdIwQYMBaA
       FHm0WeZ7tuXkAXOACIjIGlj26ZtuMDIGCCsGAQUFBwEBBCYwJDAiBggrBgEFBQcw
       AoYWaHR0cDovL3gxLmkubGVuY3Iub3JnLzAnBgNVHR8EIDAeMBygGqAYhhZodHRw
       Oi8veDEuYy5sZW5jci5vcmcvMCIGA1UdIAQbMBkwCAYGZ4EMAQIBMA0GCysGAQQB
       gt8TAQEBMA0GCSqGSIb3DQEBCwUAA4ICAQCFyk5HPqP3hUSFvNVneLKYY611TR6W
       PTNlclQtgaDqw+34IL9fzLdwALduO/ZelN7kIJ+m74uyA+eitRY8kc607TkC53wl
       ikfmZW4/RvTZ8M6UK+5UzhK8jCdLuMGYL6KvzXGRSgi3yLgjewQtCPkIVz6D2QQz
       CkcheAmCJ8MqyJu5zlzyZMjAvnnAT45tRAxekrsu94sQ4egdRCnbWSDtY7kh+BIm
       lJNXoB1lBMEKIq4QDUOXoRgffuDghje1WrG9ML+Hbisq/yFOGwXD9RiX8F6sw6W4
       avAuvDszue5L3sz85K+EC4Y/wFVDNvZo4TYXao6Z0f+lQKc0t8DQYzk1OXVu8rp2
       yJMC6alLbBfODALZvYH7n7do1AZls4I9d1P4jnkDrQoxB3UqQ9hVl3LEKQ73xF1O
       yK5GhDDX8oVfGKF5u+decIsH4YaTw7mP3GFxJSqv3+0lUFJoi5Lc5da149p90Ids
       hCExroL1+7mryIkXPeFM5TgO9r0rvZaBFOvV2z0gp35Z0+L4WPlbuEjN/lxPFin+
       HlUjr8gRsI3qfJOQFy/9rKIJR0Y/8Omwt/8oTWgy1mdeHmmjk7j1nYsvC9JSQ6Zv
       MldlTTKB3zhThV1+XWYp6rjd5JW1zbVWEkLNxE7GJThEUG3szgBVGP7pSWTUTsqX
       nLRbwHOoq7hHwg==
       -----END CERTIFICATE-----
       END_OF_CERTIFICATE
Then press “Create”

NetEdit will then generate the configuration, validate the code and see that it will work for your device. When that is done and they have passed you can press “Deploy”

You will then get a question asking if you want to deploy on the following devices, if the devices look good you can press “YES” or else you need to go back and remove the devices which shouldn’t have the certificate.

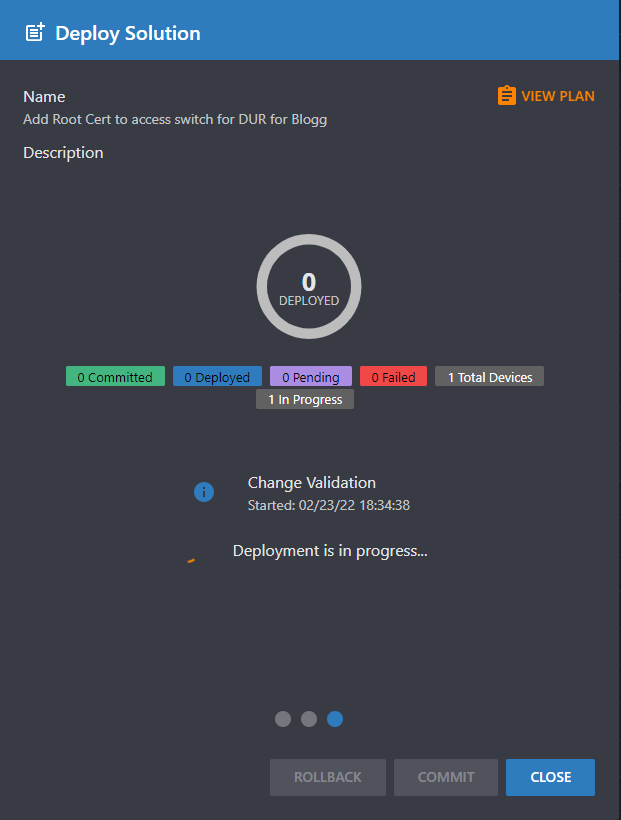
NetEdit will then start to deploy the configuration which could take a while if you have a large configuration and many devices. When the deployment is done you can check the “Change Validation” to see that there isn’t any issue with the switch and when you are comfortable that the switch is good you can press “COMMIT” and you will then get a warning that if you commit the plan you won’t be able to roll it back. You can press “COMMIT” again if you are sure that everything still works and it’s the correct device.


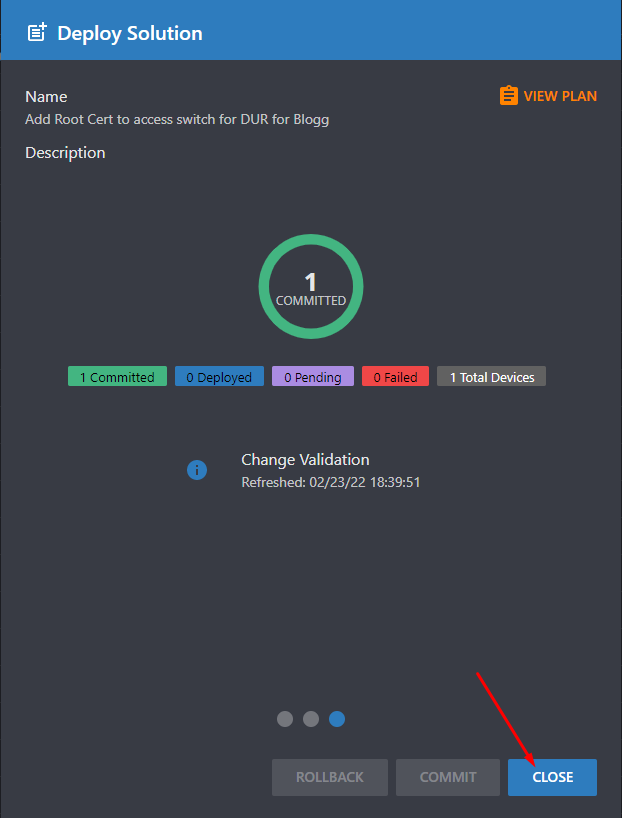
And you will then get a window where it says that you have committed the plan which you can close.

So now you should be able to use DUR on your OS-CX switch if you have the rest of the configuration on the switch.